Sunday, September 30, 2007

Projects Galore!

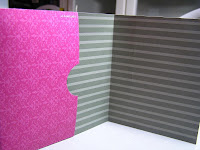
Continuing on my quest for suitable projects for my Holiday Stamp Camp, I cranked out some prototypes this past week. First up is a double-pocket card I have seen on SCS. I thought I'd try it with some of the new SU wrapping paper, but I think they came out a little too busy for this particular use.


I even tried to put the pockets on the inside (the right-hand image), but it still seemed too over-powering.


Someone posted one on SCS using a very subtle patterned paper, so I tried that next, and I think it has a bit more potential than the bolder patterns.


This is a tote bag I made last year, and decided to make it for this event using some of SU's new card stock and DS paper. This one uses the new Basic Gray card stock and Charbon double-sided paper.

This bag can be gussied up in oh so many ways, but to keep things simple I decided to just use different papers from the Charbon paper pack. This tote would be perfect for giving someone a bunch of cards, and the cards could be made to match the tote. It would also be cute stuffed with tissue paper to use for a regular gift.

Next up I found the template for this project on SCS and thought it would be a great Stamp Camp project. It is made out of a piece of card stock cut 4 x 11, so you can get 2 out of one piece of card stock. A little cutting, a little adhesive, some stamping, and voila! Just imagine the 'open' version of this sample filled with candy corn. ;-) So many possibilities!


And I finally used my SU Sweet Sampler set. ;-)


Enough creating for one day!

And now for something completely different ..... Chunky Books!

This afternoon my stamp club had their monthly meeting, and today was the end of our Alphabet Chunky Book adventure! Here is what the book looks like bound, both the front cover and a view of the pages. I have not trimmed and finished the coil, yet, but I thought I'd take a photo of the project in case the coil never gets finished.


This one is truly chunky! I will say it was pretty easy to assemble - we knew the order of the pages!

I cannot show other people's pages - it's just not right - but I can show you my pages and tell you about some of the other ones.

Here is my 'C' page, front and back:


Obviously, I could not decide on one word for a theme, so I went for whatever would fit on the page. as long as it started with the letter 'C'. Very original, I know. There is actually some stuff in my first mock-up that did not make the final cut. The cork letters on this final version were the result of me following yet another SCS enabling post that had me rummaging through the Target dollar bin. I think I have enough cork letters for several more alphabet books! Hey, they were only a dollar!

And may I take this opportunity to point out the importance of good lighting when taking a photograph. Check out that right-hand photo of the 'C' page. It really is the same color as the front of the page (SU's Really Rust, that I called 'Cinnamon' for the 'C' page) ... just bad photography ...

Here is my 'P' page, front and back:


I was still in 'busy' mode, so this got all the starts-with-P stuff: pink paper, a pink pick-up, a P with pink paisley paper, a pink ribbon with a pink pin, a padlock and a piano. And that's just the FRONT. On the back we have a pocket (a picture of my blue jeans' pocket!), with a puzzle piece and a penny, a paw and a purse. I was pretty thorough, huh?!

And my 'H' page:


By the time I got done with 'C' and 'P', I really needed to cut back on the 'stuff' and focus on one word for a theme. I went through my stash (oooh, this might count as a Stash Dive entry!) and found this Red Hat (focus on the HAT for 'H') paper. It was a 12x12 piece of these stripes, so I cut them out and made them the tops of my pages. I have had the hat stamp forever, and I used the SU Spring Flower Bouquet punch to make the flowers for the hat band. The back has the flower from Bodacious Bouquet stamped in Versamark (I think) and the lower-case 'h' from the SU Big Deal alphabet is stamped in Elegant Eggplant craft ink on Real Red card stock, then clear-embossed and cut out. The Hats Off sentiment is from the retired SU Going Out in Style set.

Some of the other creative ideas (more creative than mine, I think, mostly because they had a theme and focus) ... the 'Y' page was a View-master of all things 'Y'. The top window had a picture and the bottom window had the word to describe it - how clever was that?!?!?! And it was two-sided! There were views of the wheel both front and back! I was humbled.

And the 'M' page was in the shape of an 'M'. VERY creative! It had musical score paper and an image of a Muse. We had 'G' is for Giraffe, 'I' is for Ink, 'F' is for Feather (full of fluffy Fushia feathers!), and I could go on, but I will not. These are just so much fun to do!

We had a great time today assembling the books and planning our next project. We decided to do a 2008 calendar, due in December We will each get one month (I picked March) and we can do anything we want - ANYTHING. We just have to stick to a 1/2 sheet of card stock - 8 1/2 x 5 1/2, vertically-oriented, and have a calendar with dates somewhere on the page. I think I can do that!

Later this week I leave for Florida, and I'll be there for two weeks. I know, it's rough, but a girl's gotta do what a girl's gotta do. I go every year and other family members have the same weeks in the same timeshare complex, just different units. My biggest decision every day will be Beach or Pool. Hmmmmmm...and my Dad will want to start planning dinner around late morning.

Other than those mind-bending decisions, I will have NOTHING to do all day. I have learned over the years how to pack my stampin' stuff, and I think I got it right last year. I took two pieces of every color card stock, plus some patterned paper and a lot of white and vanilla. And all my spots. And the In Color inks. And some punches. And the last wave of must-have stamps so I would USE them. And some accessories.

Then I create a little each day, and I limit myself to a 1/4 sheet, basically making card fronts, to stretch my supplies. I act on ideas in my head, and I also take the time to do some of the daily SCS challenges. I am sure I will forget something very important, but I will either make do, or cross back over to Ft Myers and go to Mike's. But only if I HAVE to. I lived without brads one year and just added them when I got home. I think I forgot sentiments one year, too, which made things interesting ... We'll see how I do this year.

Now I must take my leave and do some laundry so I can go to work tomorrow. Three more days and I'll be outta here! Man, I need this vacation ....
Tuesday, September 25, 2007

CD Cases

I do not celebrate Chrsitmas, so naturally I offered to host a Holiday Stamp Camp for my customers where we will make projects that can be used as gifts or stocking stuffers. It is my way of testing out all the great ideas I see, but not actually having to make lots of them all myself. Sharing is good! I will enable them all!

Tonight's effort was to make a CD case instead of buying them to alter. This enables my customers to use what they already have - card stock - to make something very cool.


There is a great Tutorial on SCS for making your own CD case out of card stock. I started out following the directions, mostly, with my first sample. I used Purely Pomegranate card stock, and added a belly band made from a strip of Holiday Harmony designer paper. The seam on the belly band is hidden with a circle of Mellow Moss on which I stamped the Fleur de Lis from the Carte Postale set in Purely Pomegranate ink. I think if I spend some TIME on this, I could dress it up some more, but this also works.

Then I though, hmmmm, why not just make the whole thing out of DS paper! It is thinner than card stock, and it is already decorated! Aaaaand, since it is double-sided paper, it is thick enough to hold its shape, and the inside of the CD case will be automatically decorated, too! What a DEAL!

This is another piece of the same DS paper, and I actually left it at 12" long instead of cutting it down to 11". It just needs to be scored at 3" and 4" instead of 3" on both sides. I really like how it turned out!


This is the inside of the double-sided-paper case. See - pre-decorated! Please ignore the visible score line. That is where I figured out it should have been scored at 4" instead of 3". This is the kind of stuff that keeps me from EVER becoming a goddess, and it also keeps me humble.

Tomorrow I think I'll tackle a two-pocket card. Stay tuned!

Sunday, September 23, 2007

More Stash Diving

I took some time to do a bit more stash diving this weekend.

I got this ribbon in Mike's $1 bin a while back, thinking it would make a great accent on a birthday card, but then my brain froze when I got the ribbon home and the ribbon languished with its relatives in a bin in my closet. How sad, indeed. I struggled today on a layout to use it, and ended up with this. I also made another version without the gold dots in the corners, and on that one I also wrapped the ribbon around the Moss layer instead of the Burgundy layer. Turns out I liked that version better than this one, but I had taken the photo of this one, so that's what got posted.

Both emblems were inked in Craft ink and clear-embossed. I thought it gave it more interest, since the rest of the card is pretty plain.


Recipe (all Stampin' Up! except the ribbon): Stamps - Baroque Motifs, Linen; Card stock - Very Vanilla, Bravo Burgundy, Mellow Moss; Ink - Classic Mellow Moss, Bravo Burgundy and Mellow Moss Craft; Accessories - clear EP, Vintage brads, Ticket punch, Mike's ribbon, Ziggy pen.

For this card, yes, once again I bring you relatively new stamps on a card which is partly the result of a stash-diving rampage. The paisley card (A Muse - I think I have them in every pattern and color) and the brown ribbon are from The Stash, and I am most excited that the Celery and Close to Cocoa card stock found their way together in my scrap pile, and the card was born.

I love these little cacti from Rosie's Roadshow, and I like that they are versitile enough to be used multiple ways. Last week they became a Get Well card, and this weekend they are a Stick Together card. Actually, I think Rosie (do you think there is a Rosie at Rosie's Roadshow?) plans it that way so we buy all the sentiments. She is also quite dastardly with her Gallery posts...all it takes is a few page turns and about $100 of stamps make their way to your Must Have list. I admit, I am weak, and yes, I had the Kool-Aid, and it was sweet.

I think the real reason I like the cacti is that I can stamp them 'pretty straight' and it still works! ;-) Crooked is sometimes acceptable!

To really step outside my sand box, I added a piece of blue for sky and tore the white to give it a little character. I was not sure I'd like it at first, but it grew on me, even with the green. And I like the torn edge, because it breaks up all those straight lines that are so 'me'.

Recipe: All stamp images from Rosies's Roadshow; Card stock - Whisper White, Certainly Celery, Close to Cocoa and Soft Sky DS paper (SU), Paisley card from A Muse; Ink - Basic Black, Certainly Celery, Sahara Sand; Accessories - brown gingham ribbon, blender pen, Cameo Coral marker.

For this guy, again most of the stamps are new, but I have had the card stock for a while, so it still counts as a Stash Dive entry. I love the ovals from A Muse, and I use them to add a little depth to the cards. It takes the edge off the image being 'out there' all by itself on the blue strip.

I have been working my my water-coloring skills, which are seriously lacking. I look at a lot of other people's work and try to learn by example. For the igloo, I colored the outline with Bashful Blue to make it less stark and and also spots within the image to make it look more like ice. It has potential.

Okay, now THIS one is a stretch, and so far I have only made one. Usually once I like a card, I make 2 or 3 more to sell at my Farmers Markets, but this one is still sitting on the work table being scrutinized. The thing with A Muse images is they are so small, they fit perfectly on the small, square A Muse cards. As much as I love the A Muse cards, for selling they are smaller than the 4 1/4 x 5 1/2, so they look out of place. I still make them for sale, but I thought I'd see if I could make this work on a 4 1/4 x 5 1/2 card base.

The brown strip is actually inspired by the A Muse card stock with the brown argyle strip ... instead I used a piece of Close To Cocoa DS paper from Stampin' Up!, and I really like how it came out.

I also like the idea of using punches and elongating the shapes. I wanted to use the SU Word Window punch for the sentiment, but the opening was too small. No Problem! I stamped the sentiment and cut it into a strip the same width as the punch opening. Then I stuck one end into the punch opening from the top and punched it, turned it around and did the other side. This technique gives you soooo many more options with a lot of punches! Gotta love that!

As for qualifying as a Stash Dive entry? I have had the Palm Tree image for a while now, and while I have coveted the Hut image I never actually got around to purchasing it until recently. I think this may be a Stash Dive qualifier only in my mind, since I saw the two images side-by-each last year and I am just now acquiring and using them. Maybe not a valid entry, huh?

Recipe: Stamps - Hut, Tree and sentimernt by A Muse; Sun by Rosie's Roadshow; Card Stock - Whisper White, Close to Cocoa, Close to Cocoa DS paper; Ink - Bashful Blue, Close to Cocoa, Sahara Sand, Summer Sun; Accessories - Garden Green and Close to Cocoa markers, blender pen, sponge, Word Window punch.

And now is the time for me to come clean. I read where other bloggers cave and buy stuff not in the budget.....c'mon, who ever stays in the budget?!?!?.... We just make concessions somewhere else. In my case, it's food. I eat at work and stamp at home. I do not see a problem with this arrangement.

On very few occasions do I yield to the craze and frenzy of the SCS enablement threads. But I did get the Cuttlebug, and I really like it. What I mostly like is all the work everyone else does to come up with sandwiches for the 'bug that let me use all those other companies' cool dies and embossing accessories so I do not have to buy other Big Ticket items.

To the left (or above, depending on how Blogger decides to place things tonight) we have a sampling of my latest point-and-click extravaganza. These are Nestabilities. At first I said, "Nope, not gonna do it. Got the Marvy punches, don't use 'em much, don't need more stuff." But then I read a thread about someone looking for the now-retired SU Raised Edge Note Cards (which I, of course, hoarded when they retired), and someone mentioned the possibility of using the rectangle set from Nestabilities to make your own raised edge. I searched, just for grins, and saw they could be pre-ordered from PaperTreyInk.

Thus far I have not fallen prey to the PaperTreyInk craze, but I did mosey over to check out these dies. You see, once my hoarded stash of note cards is gone, they will be gone, and I will also be looking for a suitable replacement. Once I got a gander at the sets, and then read that PaperTrey had a SPECIAL going on if you bought ALL of the sets in a group ... and THEN I saw that if you bought ALL THE GROUPS you could save even more, I had a moment did the Demo Math.

Demo Math is where you figure how much you save with your discount, which in turn justifies the fact that you can spend even more than you'd originally planned since you'd be SAVING SO MUCH! So with the Nestabilities, if I spent $xxx, I'd get $xxx+yyy worth of stuff, which worked out to be a 25% savings - nice! Do I NEED A-L-L the circles, both sizes, and A-L-L the squares and rectangles and ovals, both sizes, and all of the above with scallops .... what was the question? No, I do not NEED them, but I had to have them. All I could see was very cool cards with a combination of dry-embossing and die-cut nested shapes ....

But then reason came to the front of the brain, and I thought I might need to buy another TOOL to use these things, and for a brief moment I almost saved myself. Then there was another one of those darned enabling links, where they provided the sandwich for using the dies in the Cuttlebug. Rats! And a sale was made.


Presenting my first card made with the circle Nestabilities. Even though I do not celebrate Christmas, I do make cards to sell, and I fell in love with this set last year and had to own it. I checked out the City of David gallery at SCS and got so many great ideas, and this is my take on several of them together.

I black-embossed the city image on Kraft to make it easier to color. I liked the 'sand' tone the Kraft card stock gave to the city. I loved the SCS sample where the buildings were colored with Pearl Ex, which I do not have, so I used my glitter gel pens from a former ATRS buying binge. Hey, does that qualify this as a Stash Dive entry? Maaaaaaybe .....

For the Nestabilites, I first cut (ran the die through the 'bug) with the green card stock, then did the purple with one smaller circle from the other set, and it worked out exactly as I wanted it to, with just a little bit of purple showing through.

To make the card work, I layered the purple behind the green, then aligned the Kraft behind it, then I stuck the whole thing on a Naturals Ivory base card. It was easier using the 'bug with the smaller pieces of card stock.

I really like how this one came out! It may get duplicated for sale!

Recipe: Stamps - City of David (SU); Card Stock - Naturals Ivory, Mellow Moss, Elegant Eggplant, Kraft; Ink - Versamark, Basic Black; Sakura stardust gel pens.

Wow, I have certainly been running at the mouth tonight! This is what happens when I spend all week at the Day Job and cram all my crafting into the weekend. Ah, and I managed to slip in a little whining there, too. ;-) Off to bed to get rested for work in the morning...

Tuesday, September 18, 2007

It's All About Me ...

Since this is my blog, I figured I'd go see if there was another Blog Thing that described a little bit about me. Lo and behold - right on the first page - there it was!

Anyone who knows me knows that I am the Red Pen Queen. And if you are reading this and you do not know what that means, then I am probably talking about you! (just kidding!)

It makes me crazy when people use the wrong words in sentences, and I find myself mentally correcting their typing. So now you can see why this test worked for me! I added a tiny editorial on one of the assessment lines, but I totally live by the last one!

You Scored an A

You got 10/10 questions correct.

It's pretty obvious that you don't make basic grammatical errors.
If anything, you're annoyed when people make simple mistakes on their blogs.
As far as people with bad grammar go, you know they're only human. [I do NOT agree with this statement!]
And it's humanity and its current condition that truly disturb you sometimes.


Coming soon: A rant about the demise of the hypen.

Sunday, September 16, 2007

More stash-diving, and a little domesticity...

Busy evening Saturday, busy day Sunday, and most productive! First - the domesticity...very unlike me, but it does come in spurts, so I go with it. First on my list was to take care of some of the veggies I purchased at the Market on Saturday. I made a vat of Ratatouille using a ton of veggies, including some peppers, and I am not talking green peppers. Well, they are green, but not sweet bell peppers. Farmer Mike and I have differing opinions of what constitutes 'a little heat' when it comes to peppers, and these are I think Poblanos. Anyway, into the pool they went.

While that was simmering, I started in on the pesto. Yes, I bought a ton of fresh basil so I had to use it, you see. The last time I caved and bought so much basil I ended up drying it. To make the pesto I need to use the Food processor. Now remember I have mentioned how teeny tiny this condo is. Once I go through the effort of retrieving the Food Processor from its storage spot, I must make the most of it being out and taking up counter space. It was still out from last week when I made the tomatillo salsa (also the result of purchases from the market), so I was fortunate. I whipped up a batch of pesto and selected a too-small container to put it in (I hate when that happens), which meant I needed to EAT some of it. So the pot came out to cook some pasta.

For dinner I had pasta, pesto, and some ratatouille. Yum!

This morning I picked up where I left off last night. I cooked down the extra tomatillo's I bought to thin out the salsa I made last week. Since it was made with Farmer Mike's poblano peppers and Farmer Gus's fresh garlic, it had a bit of a kick to it, and I thought it needed thinning. I processed them and added 'em to last week's salsa, put that back into the fridge and again washed the processor bowl.

Not to waste an opportunity to wash the processor bowl again, since it was out I decided to make a double-batch of oat crackers. I got the recipe from the Food Network, and added cheese to them to make them my own. They are yummy!

Once I was done washing what seemed like everything I own, I threw in a load of wash so I can go to work tomorrow, then did some belated snail-mail stuff. THEN, when that was all done, I celebrated by STAMPING! YAY!


First up is the card I decided will be the birthday card I send to my customers for this and next month's birthdays. I had to open my Apple Cider DS paper from Stampin' Up!, and I love it! I do not know what took me so long. Oh, right, life got in the way...

The only stamping here is the sentiment from the SU It's Your Birthday set. I love the technique I found via this card in the SCS gallery about using the new SU corner rounder punch to make this cool border. I think I did mine upside down from hers, but I like it all the same! And the sentiment is crooked, of course.

With the birthday cards out of the way, I rummaged in my recent SU shipment of goods and found the So Many Sayings Hostess set I'd received and decided to finish mounting it. I had purchased the dominoes a few weeks back, and started the process, but got tired or something, who knows why I did not finish it, but today I DID!

I had to move up to a larger storage box, which is why I think I stopped the mounting process before. Ah, it all comes back to me now. ;-)

I was still trying to save space, so I mounted one at the top of the domino, then the next one at the bottom of the next domino, so they could face each other in the box and 'nest', if you get my drift. I also double-mounted the rows of designs (X O X O... and hearts, for example) to save space and weight. These puppies are heavy!

Anyway, no, I have not used them yet, but they are mounted and ready for ink. Done!

Next up, I have been selling a bunch of Get Well and Sympathy cards lately (not to the same people!), so I needed to replenish my inventory.

I got this Carved & Candlelit set with my last order's Hostess bennies. We all know I do not 'do' Halloween or Thanksgiving, at least in cards, so it would be perfectly natural to wonder why I chose this set. THIS is why! Not pumpkins - Cactus! Or is that Cacti? I saw this done on a card on SCS and I had to have the set to try it myself. I added the sentiment from Rosie's Roadshow and used the black marker to add the question mark and the spikes on the cactus.

Recipe: Stamps - Carved & Candlelit (SU), Crosshatch bg (SU), sentiment from Rosie's Roadshow; Card stock - Very Vanilla, Basic Black; Ink - Always Artichoke, Basic Black; Accessories - Black gg ribbon, black marker, dimensionals.

These cactus stamps were in my last Rosie's Roadshow order. I had this card in my head when I ordered them, so that justifies their purchase. At least it does in my head!

I stamped several of them, and they are even pretty straight! Whazzup with that? ;-)

Recipe: Stamps - all by Rosie's Roadshow; Paper - Very Vanilla, Basic Black, Almost Artichoke; Ink - Basic Black, Almost Artichoke, Sahara Sand; Accessories - Artichoke gg ribbon, blender pen, Cameo Coral marker.


I also had this card in my head when I saw the stamps. Naturally I just 'picked them up' when I was in the LSS to pick up my order. I am weak.


The card is one of the new ones from A Muse, and it works really well with SU's Certainly Celery. At least that's what I used here.

Recipe: Stamps - all by A Muse; Card stock - A Muse card base, Basic Black, White White; Ink - Basic Black, Certainly Celery, Sahara Sand; Accessories - Black gingham ribbon, SU Scallop punch, Marvy circle punch.


These next two qualify as Stash Dive entries, even though the stamps I used are new. As I was organizing a bit in the Craft Room, I discovered these sets of embossed note cards and envelopes from Lasting Impressions.


All the stamps are from Rosie's Roadshow. I have had a lot of people ask me for New Home cards lately, so I thought these might work for that category. If not, I like them anyway. ;-) And it uses up some of my stash!


Sadly, people have also been looking for Sympathy cards, so I decided to add to that selection, too. This also qualifies as a Stash Dive entry since it uses a piece of paper from The Stash. It also uses a sentiment from Custer's Last Stamp that I bought months ago and have never used.


Enough creating for one night! I need to fold laundry and by then it will be time for bed. Gotta go to work to support my habit. ;-)

Saturday, September 15, 2007

Just checking in ...

I realized it has been a while since I've posted, so I thought I'd make a brief appearance today. I have created very little the past week or two - been too busy with classes...prep, execution and clean-up. I am NOT complaining, not at all! I love it when my classes are full and everyone has a good time learning they can create and learn new things! The sessions just cut into 'me' time, so I am just now getting back into the swing of things.

The past two weeks at the Market have been good. Last week it was a little too hot for me, but lots of people were out and about, so the market was well-trafficked. It is so nice with all the people and their dogs bustling about! Today was a glorious day - cool, sunny and windy. Or should I say gusty! We spent most of the day running around catching things that blew away! I finally gave up on my card spinner racks and put everything in boxes to save myself the trouble of chasing the cards. Good exercise, but not really my preferred way to spend a Saturday, ya know?

I bought more than my share of veggies, of course, so I have plans to bake and cook over the next few days. We'll see how that transpires. ;-) Bake + Veggies you may ask? Think Zucchini bread! The farmers all had a ton of the stuff!

Ah, and Krum's Mom, Jennifer, stopped by with an update. The little guy has turned into a real pistol around the house...he sounds like a lot of fun! Last week he had what was diagnosed as kitty lice, but a little bath with Dawn dishwashing liquid and all the lice died. I kid you not - I could not make that up!!! The first bath (with her son assisting) went so well that she tried a second one on her own. Krum was fine watching the little bowl in the sink fill up with water, but as soon as it looked like he was headed for it, he complained. A lot. After Jennifer showed us her scratched forearms, she commented that it might be time to clip his front claws again. But all is well, and her two other cats have accepted him into the fold.

This is all good news, since the Farmer who'd found him stowed away in her truck told us that she has seen Krum's Mom & Dad, but none of the other kittens. Ergo, Krum is one lucky fella! I like to think that Momma Cat put Krum into the truck hoping a big-hearted city girl would take pity on him, which is exactly what happened. We are all very happy!

I asked for an updated photo of Krum when she gets a chance, and she agreed. I will post it when it comes my way.

Now that I am coming down off the week of classes, I plan to spend the rest of the weekend and my evenings next week creating. I have many ideas filling my head, and at last I will get to try out some of them. I was going to do some more local shows this fall and winter (pre-Christmas), but today in the gusting wind I talked myself out of them. So all the plans for ornaments and holiday stocking-stuffers have fallen off of my to-do list. Bah, humbug? Nah! I just need to (1) make money this year so Uncle Sam thinks I am in this to make money, and (2) keep it fun! The thought of purchasing a tent and taking the time to set up and break down, rain or shine, did not sound like fun...at least not this year. Let's see if I can stay in the black and I will re-evaluate my options next year.

That means I may hold a few more classes or Stamp Camps as we get into November, which will let me make a sample of all my ideas to Demo, but not have to make more than one of anything since I have no plans to sell them. Sounds like a winning compromise to me!

I think now I'll go triage the veggies in the kitchen and strategize the cooking and baking. I look forward to a veggie- and creation-filled week!

And Happy New Year - 5768 - to any Jewish readers!

Wednesday, September 5, 2007

Driving laws as understood by DC-area drivers


1. Directionals are optional equipment on all vehicles sold in the Metro DC area. (Any vehicles with working directionals were undoubtedly purchased out of state.)

2. If you are in a driving lane that can go straight or turn left at an intersection, it is not necessary to use your directional. The people behind you will understand your intentions once the light turns green and you do not move, as will the oncoming traffic.

3. When turning left, directionals are not necessary if you pull far enough into the intersection. This maneuver, if executed well enough, will put you so far into oncoming traffic that you effectively give yourself the right-of-way.

4. Merge lanes are not to be used to join moving traffic already in the driving lane. Merge lanes serve the purpose of giving you a straight-away to gain enough speed that by the time the lane lines are gone and you are just about on the shoulder, you can cut off the driver immediately to your left, who is in the driving lane, forcing him to stop. This technique, when well-executed, can back up traffic in the driving lane for miles.

5. Optionally, the merge lane can be used as a passing lane. You can leave the driving lane and slide into the merge lane, attain proper speed, and blow past the suckers sitting in traffic, right up to the point where you are on the shoulder, then follow the steps in #4 above to stop traffic and join the other cars in the driving lane.

6. Solid white lines are no different than dashed lines, and may be crossed at will. Crossing a double solid white line is even better.

7. If you are on a two-lane road with parallel parking on the edges (that's really a 4-lane road, but with two driving lanes ...), and someone stops to maneuver into a parking spot, or if a garbage truck is making stops, you have the right-of-way. You may move to the left of said vehicle and cross the two solid double yellow lines, on the curve in the road, to pass the vehicle that is in your way. This right-of-way overrides the right-of-way of any oncoming traffic.

8. If you are in the left of two lanes, you are allowed to turn right into the gas station without regard to traffic that might be in the right-hand lane.

9. If you are turning left onto a road, and multiple lanes turn left, and you have plans to turn right at the next block, you must start off in the far left-turn lane. This will give you additional lanes to cross over within the next block in order to turn in time, and increases your chances of stopping traffic in multiple lanes.

10. If there is an incident on the shoulder of the freeway, you must slow down to get a good look at what is going on. If there are emergency vehicles present, you must come to a complete stop to get a really good look. This serves to increase the traffic back-up by several additional miles.

11. If your light is green, you must enter the intersection, without regard to whether or not your vehicle will actually clear that intersection. If your light turns red and you are blocking the cross-street traffic, you must look straight ahead and never make eye contact with the blocked party.

12. If you want to turn left from a side street onto a main street, again, directionals are optional. What works best is nosing your vehicle into the driving lane so far that you force traffic to stop so they do not hit you. Make sure that as you turn you wave to thank them for not slamming into you.

13. If you are on a hand-held cell phone, you are allowed to go very fast, and you do not need to use your directional when changing lanes. After all, your directional hand is busy on the phone. The other cars will 'get it' when you move into their lane without regard to the fact that they might already be in that lane.

14. If you are running into the grocery for 'just a few things' you may stop your car next to the yellow curb with the posted sign: 'No Stopping, Standing or Parking - Fire Lane'. Those empty parking spaces in the lot are for other people.

15. If someone gets pissy with you about parking in the fire lane, you may park the car in the nearest handicapped spot.

Monday, September 3, 2007

Laboring at Creative Avoidance

I love long weekends, because after spending all day at the Saturday Farmers Market I still have 2 whole days left to catch up on life! I had A Plan this weekend to do several things, with stamping at the bottom of that list. Yes, the bottom. I am so behind on the rest of my life, I actually wanted to catch up a little bit.

First on my list was to go through my paperwork and start to file my FSA stuff for the first half of the year. Yes, I know it is September...I told you I was behind! Next on the list was to finish the online survey I am supposed to do for my Financial Planning service. They re-evaluate my finances for me every few years, but I have to give them the information. This requires me going through pay stubs, investment and IRA statements, bank statements, etc. I started this in...oh... April or May maybe? I am now getting not-so-subtle reminders that they cannot help me unless *I* do something first.

Next I am about 4 months behind in replacing my refrigerator water filter. Sears sends me nice cards reminding me of my model number and the replacement filter I need to purchase. Yeah, I know. But going to the Mall is just under Chinese Water Torture on my list of fun things to do, so I have not been yet. Last week I decided to order the durn thing online, and I have succeeded in moving the reminder card with the part number from room to room, and it now sits right next to the laptop on which I am keying all this balthering. Not ordered yet.

And the next Chunky Book project is due the 30th of this month. It is an alphabet theme, and I have the C, P and H pages. The H and P pages are designed and done, but the C page is not even fully designed yet, much less done. I really need to work on that... We've had all summer to work on it, but did I take the time to get ahead and not wait until the last minute? Nooooooo....

I DID finish designing all the cards for next weekend's workshops, though I have not uploaded them yet, nor have I cut the kits.

Then I needed to address all the veggies I bought at the Farmers Market on Saturday. And I wanted to make another batch of the yummy cheese crackers I made last week.

What have I been doing all weekend you might ask? Enter the Creative Avoidance. I am the QUEEN of Creative Avoidance. I think part of my problem is I live in this teeny tiny condo, so I cannot go anywhere and not see stampin' stuff. It can be very distracting.

So, I started in on another phase of my Stash Dive self-challenge. I decided to use another whole piece of scrapbook paper from The Stash. I liked this piece of paper so much I apparently bought it several times, but I only planned to use one single 12x12 piece of it this weekend. That's all!

So here we go...

First up is another version of last week's SCS Sketch Challenge; I just used different paper and cardstock, but I did use the same image from the Stampin' Up! True Friend set. Isn't this paper yummy? Here I put it with Not Quite Navy, Ruby Red and Very Vanilla. Since I put a piece of SU bling in the center, I did not want to put brads on the corners of the center image, so I opted for the SU Ticket Corner punch instead. Naturally I had already stuck the layers together, so I had to un-stick them, punch them, then restick them. Yes, they are crooked, but they were straight before all that unsticking. Really!

Next up, the same paper and card stock, but the layout is for Captain Crafter's Challenge #23. The sentiment is from a box of general sentiments I bought last year but amost never use. Perfect for this self-challenge!

Oh, and I made four more of these, partly to use up the paper, and also because I think they might sell. ;-)

For this design I decided I was sick to death of Not Quite Navy and Ruby Red, so I switched to Chocolate Chip for the bottom layer. I also switched to Natural Ivory instead of Very Vanilla.

I used the SU Key Tag punch with a piece of 1" wide card stock, stuck the end of the card stock into the punch opening and just punched one end of it. Then I layered it on Chocolate Chip and hand trimmed around the edges. The sentiment is from SU's Hugs & Wishes set. I made two cards of this design.


For this one I don't know WHAT I was thinking, but I started cutting. It began innocently with 1 1/2 inch squares, then when they did not fit the space right, I cut them into parts-is-parts. They still did not fit, so I put a blue strip in the middle.

I tried using the new SU Three for You punch, but I decided the paper had enough tiny flowers already, so I went with the bigger flower punch. I layered it on the Red and Blue (still sick of them, though) and added a piece of SU bling.

I stared at the blue strip for a while until I decided to use a small Thanks sentiment (Lockhart) with Vanilla Craft Ink and embossed it with Vanilla EP. Done!

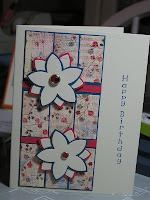
More of the pieces here, but layered on a piece of blue instead of red. I filled this space with red strips of card stock, and added more of the same flowers, and the Happy Birthday (Inky Antics) to finish it off.


[This space left blank to pacify Blogger.]


This last one was a real stretch, and I looked at the pieces for a long, long time. You can see the scrap of paper that was left is pretty small, but I had to use it ALL, so there I sat. And sat. And stared. I cannot tell you how many times I moved the parts around until I ended up with this layout. It's okay, but I am not crazy about it.

The sentiment is from SU's All Holidays set, and the flower stamped on the base card is from SU's In The Spotlight Hostess set. It also fits quite nicely in the flower punch (SU is really sneaky like that!), but it was a little too much, I think, and anyway the flowers were already cut and bradded together, and my chances of hitting it on center were slim and none, so I didn't.


And now for the reveal! See those three little strips of paper? That is ALL that is left from the 12x12 sheet. Yippee!! Success!

That makes 11 cards in 6 designs, and it only took me A L L D A Y ....

Well, it did take me all day, but it's not like I sat at the table all day doing nothing else. I actually got some of the cooking out of the way. I made a double-batch of the Oat Cheese crackers (yummy!), a double-batch of Tomatillo Salsa (double yummy!), both of which used my food processor, so I was doing much washing between batches and recipes.

I also sliced and diced all my veggies and roasted them in the oven. I'll feed on that all week long.

FSA filing? Not done. Financial Planning data entry? Not done. Workshop kits? Not done. Online ordering the refrigerator filter? Not done. Chunky Book 'C' page? Still not designed. But I did use a whole 12x12 piece of paper, and it is gone from The Stash. Like I said the other day, though, at this rate it will be about 7 years until I make a significant dent. Ah, well, I am happy for the baby step I made today. ;-)

Saturday, September 1, 2007

Krum update, Stash Diving, and more!

Today was a very long and busy day. But before I get into that, I first want to show some more Stash Diving I did earlier this week. I re-discovered two packs of Spirelli shapes in my stash and forced myself to open the packages. I do not have the Spirelli kits, just the card stock die-cut shapes. I looked it up on the Web, and the instructions said to use Spirelli thread. Yeah, right.

So I did some more stash diving into my cross-stitch floss-of-every-color stash and pulled out a spool of verigated, metalic, irridescent, single-ply floss. Perfect.

Never having done this before, I thought back to my days of wrapping string and wire around nails punched into a board, and as I translated that to floss and cardstock, this is what came out. Kinda neat, huh? I layered the heart on Stampin' Up!'s Taken With Teal, then put that on some shiny gold stuff from The Stash, and layered the whole thing on a piece of the new SU textured card stock. I really like how it turned out!

On a twisted note, I walked by this card as it was lying innocently on the table the other day and thought it resembled a woman's derierre wearing a thong. That is certainly not how I plan to sell it, though. Of course, people can read anything into it they want to.

On to today's market. It was a banner day all around today! As the calendar turned to September, the weather turned into October over night, and it was glorious this morning. This is good because there was a 5K race scheduled for the neighborhood where we hold our market, and we had to get set up at O'Dark Thirty or wait until 10:00 am. Since they close the roads and restrict parking, too, I opted for the early arrival. Yawn!

The first excitement after the runners passed by (great advertising for the market!), was the arrival Krum's new Mom, Jennifer, WITH KRUM! He was in a little snugglie, all nestled up against her. Too cute!

He has grown a LOT, and Jennifer was happy to report he is fully litter-trained and eating soft kitten food. He is about twice the size he was two weeks ago! His eyes are no longer new-kitten-blue and have turned more gray-green. He is just adorable.

He also identifies Jennifer as 'Mom', and right after we took this shot he scooted back into the snugglie and tried to go to sleep. What a great start to our day!

The other good stuff about the market today is that it was hoppin'! Sales were pretty good all around for both the farmers and the crafters. It seemed like a lot of people in the community were not even aware there WAS a market every Saturday, so hopefully we will all have new customers in the weeks to come.

I sold several of my Stash Dive creations of weeks past, which was very encouraging. I also had a great sale just before 2:00, when we close - someone bought 11 cards! Woo-hoo! Made my day!

During the hours of the market we have lots of conversations with customers and passersby, and everyone is very friendly and willing to humor us. We usually ooh and aah over the pets that parade through, but sometimes things take a different turn. For example, when a woman stopped by to admire the photographer's wares, I noticed her T-shirt. I immediately recognized the style as matching some of the stamps in our SU catalogs, so I asked her if she'd let me take a photo of her shirt, and she agreed.

Before I took this shot I asked her if she thought I was being weird, and she said yes, but it was still okay to take the photo. Isn't it a great shirt? Inspiration abounds everywhere you look!

[This space intentionally left blank to make Blogger happy.]


Then we have those moments when things are slow and we have to make conversation amongst ourselves. This shot to the left is an example of what can happen when we are left alone for too long without customer interaction. This farmer had an eggplant in his bin with a bit of a deformity, so he started playing with it. In profile it looked like Nixon, but then he grabbed a few cherry tomotoes, and, well, it was a very long day.

With the long weekend I hope to do some more Stash Diving and creating. I also need to plan the projects for next weekend's workshops. Maybe if I dive into my SU stash I can combine the two. Hmmmm...possibilities abound!