Tuesday, July 29, 2014

SOS #162: Triple Threat

Happy Tuesday, the day after Mundane. We've got a new challenge up at Shopping Our Stash. This week's theme is Triple Threat, and we'd like you to use at least three things from the following list: ribbon, flowers, lace, pearls, sprays/mists, punched elements or die cut elements, rhinestones, doilies (stamped will work too), dry embossing or scoring -OR- use three of one type of embellishment.

I challenged myself to use all stash on this card, and I mostly succeeded. Here's my card, then I'll explain:


This was big for me. BIG. I decided to use lace, and not just any lace, but Pick Your Plum lace that I bought in a weak moment many years ago. Lace that I decided to not put in the Yard Sale pile, since it occupied a drawer in my Library Card Catalog and really wasn't taking up valuable shelf space in the closet. Yes, I talked myself into keeping it, so I used it here.

But first I needed a piece of paper that could handle lace, so I went to The Heaplet and chose a piece of cut-off from a Webster's Pages froo-froo paper. I used two items from the challenge list right off the bat: that (gah) pink lace (I swear it was advertised as a cream ...) and a piece of SU Very Vanilla taffeta ribbon. Ribbon and lace - check.

I was originally going to add pearls on some of the swirls (heh heh that rhymes), but instead I decided I needed a die-cut something over the lace and ribbon to make sure it stayed put. The lace is self-adhesive, but not really, if you know what I mean. Thus, I dug out my neglected MFT doily dies and cut the larger one you see here, then I went to town and added a circle cut from another piece of the Webster's Pages paper from The Heaplet, and yet another doily to go on top of it. Doilies, and die-cuts - check!

To hold them all together I dug out an SU Antique Brad, punched holes in the centers of the die-cut stuff, and attached the whole stack through the ribbon and lace and through the card front. It's not going anywhere.

For my last act, I stamped the sentiment in Hero Arts Charcoal ink, added some foam tape to the blue panel, and put it on a cream card base. The base is from a pack of Bazzill Basics card stock I forgot I had, so it qualifies as stash, too. AND, the doilies were cut from the same card stock. Wheee! :)

So, wanna play along with us this week? I think you should! Come on by to check out the cool cards by my fellow SOS teammates and leave them some comment love.

Thanks for stopping by!


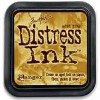
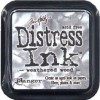
Stuff I used: Webster's Pages remnant from The Heaplet, SU Very Vanilla taffeta ribbon, Pick Your Plum self-adhesive lace, Bazzill Basics - Chandler card stock, SU Antique Brad, and the following:


Sunday, July 27, 2014

Wow, Man, Colors!

I was playing with something the other day, something that involved several colors of embossing paste. Since I'd colored it myself, anything I didn't use would be wasted unless kept going and used it up. So, I grabbed a fun Hero Arts stencil and made this:


There were only three colors of embossing paste (my usual red, blue and yellow): Festive Berries, Peacock Feathers, and Mustard Seed. I'd colored two of the blobs of paste with Distress reinkers, and one with Distress paint. The colors you see here are from my attempt to cover the whole stencil with what remained of the three colors of paste, so there was some overlap, which resulted in very cool colors. Like, wow, man. Trippy.

All I needed to do was select a card base and a sentiment, and I was done. Fun, huh? I might have to do this again. :)

Thanks for stopping by!

I'm entering this in the current Simon Wednesday Challenge - Emboss It and the A2Z Scrapbooking July Link-up


Beer:30

After yesterday's card disaster, I decide to try again with the beer, because I really like it. Not beer, but the die-cut and colored beer image. I can't drink beer, since it has bubbles. Carbonation doesn't like me.

ANYway, here's my next attempt with the beer:


I had two pieces of this embossed tweed background on my desk, left from an experiment I never finished. This one was embossed with clear, and the other one (still languishing) was embossed with white. I suppose I could make a second card with the same inks and put them side-by-each, which was going to be my experiment. Maybe.

I took three random colors of Distress ink and used them to color the embossed background to dull it up a bit. The embossing was very shiny, and I didn't think shiny went with beer. Then I added the sentiment banner and the beer mug. Done.

Here's a close-up of that beer, because I really like how it turned out:


I have enough of that Frosted Film for about 33,574,634 more mugs, but I might be tired of coloring them, so you're safe, for a while. Also, that frosted film is not re-positionable, which is why I could be tired of coloring. Just sayin'.

Thanks for stopping by!

Edited to add: I'm entering this in the following challenges:
The Male Room - Geometric
Simon Wednesday - Emboss
Stuck On You Sketches - Die Cut Food & Beverage
A2Z Scrapbooking Link Party

Stuff I used: vat of clear embossing powder, misc vanilla card stock, and the following: